

How To Install 30 Amp Rv Breaker
Tabular array of Contents Hide
- Can Y'all Connect Your RV to Your Home Without a xxx-Amp RV Plug?
- What Is the Difference Between thirty Amp & 50 Amp Plugs?
- How Many Volts Does a 30 Amp Service RV Have?
- Where Should You lot Install the 30 Amp RV Receptacle?
- What Kind of Wire Do You Demand to Install a 30 Amp Plug?
- What You Demand For The Chore
- How to Install a 30 Amp RV Plug
- Shut Off the Main Breaker
- Install the Outlet Box
- Install a New Breaker in an Empty Spot
- Run the Wire Through the Conduit
- Connect the Wires to the Breaker
- Run the Cables to the Outlet Box
- Switch on the Breaker & Test
- Should You DIY or Hire a Professional for This Job?
- Is Installing a 30 Amp RV Plug at Domicile Worth It?
Most RVs, particularly smaller motorhomes, travel trailers, and fifth wheels, apply a 30-amp RV plug. That means you'll need a 30-amp outlet at home to fully ability your RV when information technology's parked in that location.
Unfortunately, most homes aren't gear up for this. But on the bright side, safely installing a 30-amp RV outlet isn't complicated. A handy practise-it-yourselfer with some bones knowledge of electricity tin practice the install. If y'all're inexperienced with electricity or concerned about doing the chore, consider hiring a professional.
Get-go, let'due south learn what you need and how to install a xxx-amp RV plug at home. And then you can make up one's mind if y'all're confident plenty to do it yourself.
Can You Connect Your RV to Your Home Without a 30-Amp RV Plug?
You can connect your RV to your home's power without a 30-amp RV plug, but information technology will limit which and how many appliances you can operate. A typical 120V home outlet is on a 15-amp or xx-amp breaker. This means you're operating with about one-half the ability you'd get when plugged into a 30-amp outlet.
Many of the appliances in a 30-amp powered rig will all the same operate, just y'all can't run many things simultaneously. For example, if you have the coffee pot on, you can't safely operate the air conditioner, heater, or microwave at the same time.
To connect, use a 30-amp to 15/20-amp adapter for your RV. Also, use an outdoor-rated extension cord that'southward a heavy plenty gauge (a 10-gauge should do) to handle the amperage. It should as well be as brusk equally possible. Most typical extension cords are not rated to handle the load of a 30-amp or fifty-amp RV. This set-upwards should only exist for short-term usage.
What Is the Divergence Between xxx Amp & 50 Amp Plugs?
A 30-amp plug is used on smaller RVs that don't unremarkably power annihilation more than a microwave, a furnace, a single Air conditioning unit, etc. Larger motorhomes and fifth wheels with several power-hungry appliances typically employ 50-amp plus. This means they can power things like dual AC units, a washer/dryer prepare-up, a dishwasher, and the like.
There are also physical and usage differences between a 30-amp plug and a 50-amp plug. A 30-amp plug has 3 pins. These are a 120-volt hot pin, a flat neutral pin, and a circular ground pin. It can provide up to 3,600 watts of power.
A fifty-amp plug has iv pins. In that location are ii 120-volt hot pins, a flat neutral pivot, and a round ground pin. A fifty-amp plug can provide up to 12,000 watts.
Pro Tip: We accept everything yous need to know nigh RV power cords right here →
How Many Volts Does a 30 Amp Service RV Take?
A typical thirty-amp RV service is a single-pole service (i hot pivot) that requires 120V. A 30-amp, 120V service provides 3,600W of power (30 amps x 120V = 3,600W).
Where Should You lot Install the 30 Amp RV Receptacle?
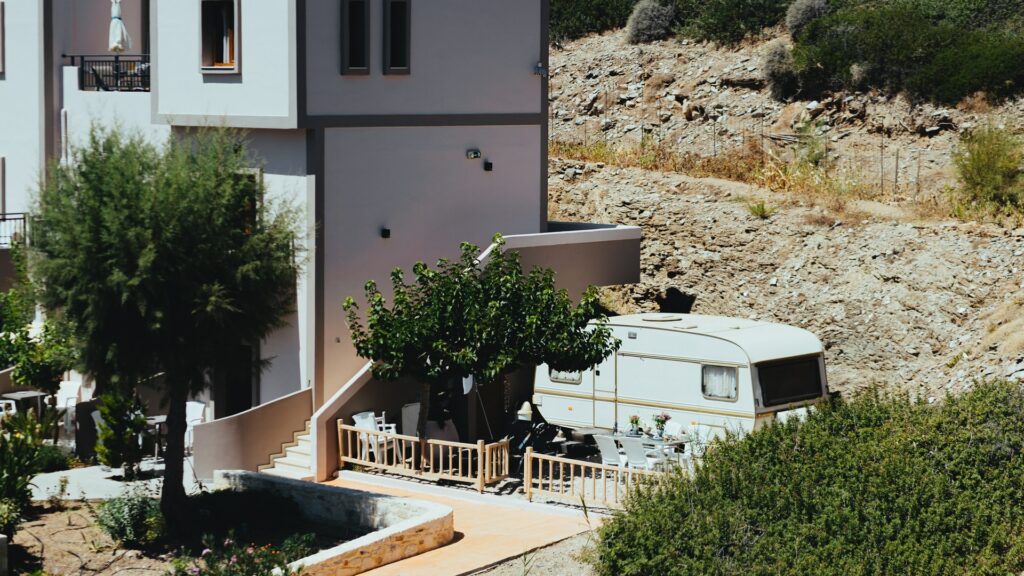
Install the 30-amp RV receptacle shut to where you park your RV. Usually, you'll use an RV power pedestal similar to what you run across in a commercial RV park. You could utilize a uncomplicated 30-amp RV outlet mounted on a wall or post, but it's a more difficult installation process.
Wherever you mount the receptacle, information technology must be solid. Plugging and unplugging a 30-amp RV plug puts a lot of stress on the outlet, then information technology needs more reinforcement than a standard household 15/twenty-amp outlet.
What Kind of Wire Do Y'all Need to Install a thirty Amp Plug?
You lot need 10-2 or eight-two UF wire to install a 30-amp plug. The number before the dash is the gauge of the wire. The lower the number, the thicker the wire, and the more amperage it can handle. The number subsequently the dash is how many conductors the wire has. UF ways it'due south rated for outdoor usage.
Almost installations (under 150-anxiety in length) tin can safely use 10-2 wire. It has a black 120V hot wire and a white neutral wire; these are the two conductors. At that place should besides exist a light-green ground wire.
An 8-2 wire is the aforementioned as 10-ii, but it's thicker and can handle 30 amps in runs longer than 100 feet. If your installation is less than 100 anxiety, utilise the 10-ii wire.

Pro Tip: Before y'all outset any electrical project for your RV, make sure you know the basics of RV wiring and electrical.
What You Demand For The Chore
There are a few items you'll need before tackling the installation:
- An empty space in the breaker box for a 30-amp, single-pole breaker.
- A new 30-amp, single-pole breaker. (This breaker has one handle and one terminal for the hot wire to connect.)
- Plenty UF-rated ten-2 copper wire to run from the breaker box to the RV pedestal. Apply 8-2 copper wire if your run is over 150 feet.
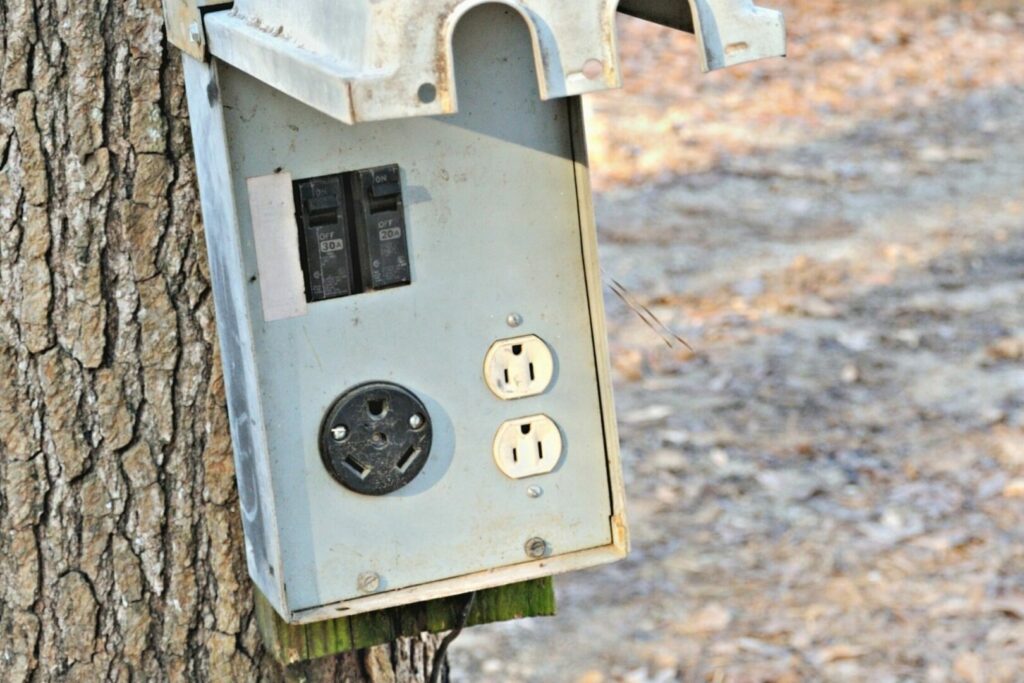
- A weatherproof RV pedestal with a 30-amp (NEMA TT-30R) outlet OR a separate weatherproof thirty-amp (NEMA TT-30R) outlet for wall mounting.
- One-inch diameter conduit for the wire anywhere that it can't be buried at least 24 inches deep, as required past lawmaking.
- Wire staples or clamps to secure the wires running to the pedestal and billow box.
How to Install a thirty Amp RV Plug
With the appropriate supplies in hand, let's move on to the installation process. It'due south non overly complicated, simply working with electricity can be dangerous. You must understand how to safely work with electricity before proceeding.
If you lot feel confident in your electric skills, here's how to DIY install a 30-amp plug at home.
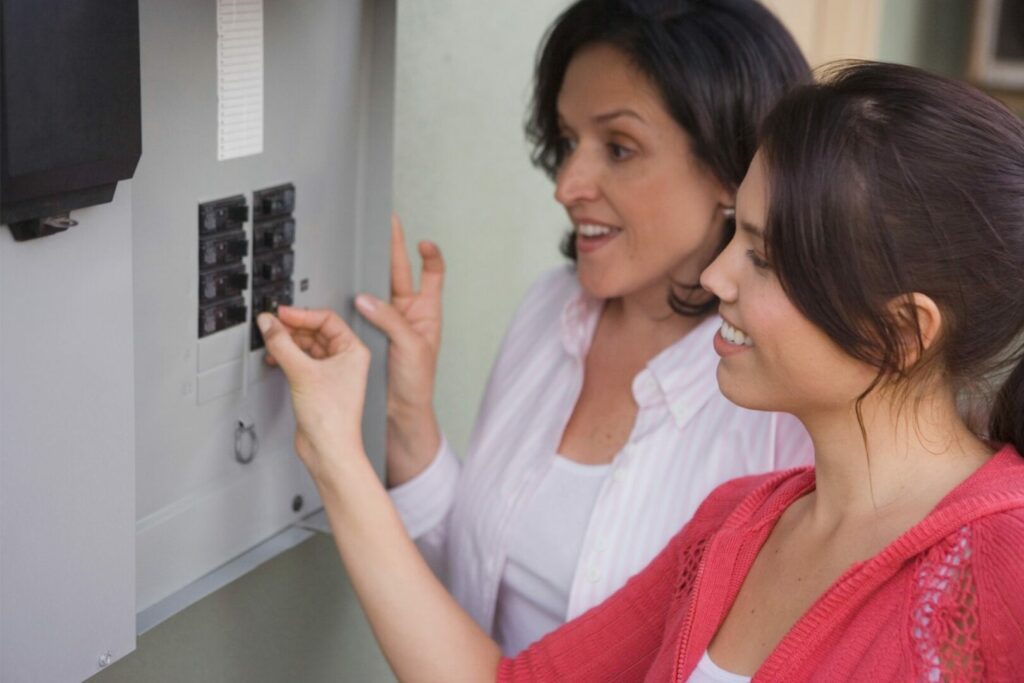
Shut Off the Primary Breaker
This is the crucial get-go step. The main billow will either be a 100-amp or 200-amp billow. Shut it off so there'due south no ability going to the other breakers or out of the breaker box.
Keep in mind there could be another breaker box somewhere that has a master breaker that feeds into this i. Discover information technology and shut it off as well.
Even when your main breaker is disengaged, there'll be alive wires connected to the main breaker. Be careful not to bear on the live wires while working at the breaker box.
Use a voltmeter or a non-contact voltage tester (which we prefer) to bank check the other breakers to ensure they're dead (no power running through them). Put record or a annotation over the master breaker later on you plow it off so that someone else doesn't come up forth and plow it back on while you're working.
Install the Outlet Box
Mount the RV pedestal or outlet near where yous plan to park your RV. Test the mounting site to brand certain it's solid, and follow the instructions that come up with the kit. This is the easiest step in the installation process.
Install a New Breaker in an Empty Spot
Before installing the new billow, double-check that the power is off. We tin't stress this enough: This is crucial whatever time you'll be working at the breaker box, connecting wires, or working at the pedestal or outlet.
As mentioned, the breaker box needs to have space for a 30-amp, single-pole breaker. Install the new billow into the empty slot, not touching the live wires continued to the main breaker terminals.
Run the Wire Through the Conduit
Run the wires through the conduit before you connect them to the breaker and the pedestal or outlet. Per code, the wire must run through a protective sleeve above ground downward to eighteen inches deep. Bank check for any variances in local code that may accept stricter requirements than the national code.
As long as the wiring is rated for outdoor utilise, it can run without a conduit if it's buried at least 24 inches deep. It withal requires a conduit where it goes in and out of the ground.
Connect the Wires to the Breaker
Next, connect the wires to the breaker. The green ground wire connects to the ground bus and the white neutral wire connects to the neutral bus. And then, connect the blackness 120-volt hot wire to the terminal on the new 30-amp breaker.
Run the Cables to the Outlet Box
Once the wires are connected at the billow box, move to the pedestal or outlet. The terminals on the dorsum of the outlet are typically well labeled; you'll likely notice them on the pedestal or split up receptacle.
Attach the green ground wire to the concluding labeled green, which is the dorsum of the U-shaped pigsty. Connect the white neutral wire to the concluding labeled white or neutral (unremarkably a silver screw) in the vii o'clock position from the back of the outlet. The black 120V hot wire connects to the hot last (ordinarily a brass-colored screw) in the five o'clock position from the back of the outlet.
Switch on the Breaker & Test
Information technology'southward just well-nigh time to exam your handiwork. Commencement, we strongly propose double-checking your piece of work both at the breaker box and at the outlet. If in doubt, don't turn it on until you're sure the wiring is right.
In one case everything looks practiced, plow the breakers back on and plug information technology in. If everything is working equally information technology should, yous're good to go!
Should You lot DIY or Hire a Professional person for This Chore?
Most folks who are handy with repairs and have a solid understanding of safely working with electricity should be able to handle this installation. But even if y'all're knowledgeable, don't let your guard down. When working with electricity, always double or even triple check your work before powering upwardly.
If y'all're hesitant about working with electricity, bring in a professional. There's nothing incorrect with letting a pro practise the job.
This is too a fairly straightforward job, so it shouldn't exist overly expensive. A professional person installation for a 30-amp pedestal or outlet should cost between $300 and $ane,200. Y'all can keep that cost down past installing the pedestal post, digging a trench for the conduit (if necessary), etc.
Is Installing a 30 Amp RV Plug at Home Worth It?
If you lot've got a place to park your RV at dwelling, why non install a 30-amp plug? You can keep the batteries total, do repairs and maintenance, or even utilise information technology as a invitee house.It'south an piece of cake enough task to do yourself, but professional person installation isn't also expensive either.
Here's another tip nosotros'll throw in: If you lot install a thirty-amp outlet, it might be wise to wire a 50-amp outlet at the same time. That way, yous can upgrade your rig in the future or permit a friend with a l-amp rig park there. Near pedestals have both outlets and having both wired at the same time cuts the cost of split installation.
Either way, it'south a useful addition to your RV armory that could salve you a lot of time and money when doing repairs or general budget.

Source: https://www.getawaycouple.com/install-a-30-amp-rv-plug-at-home/
Posted by: bovesamid1941.blogspot.com
0 Response to "How To Install 30 Amp Rv Breaker"
Post a Comment